Now we're making business! This is by far the most difficult part, but if you've tried out the rest, if you've already opened and sewn a seam using my method, you will see that this is based on the same principles, but it takes a bit more of your attention and time. So let's get started.
1. Use an accurate ruler to determine the diameter of the buttons you selected.
Tip : make sure that the buttons you will use are the same size for both sides, because they will be using the same button holes!

2. Mark the buttonhole on your fabric, according to the pattern, taking of course into consideration the button size. I used heat disappearing markers.
Making a sample is always helpful, not only for mastering the method, but also for determining you're using the right measurements for the buttonhole.
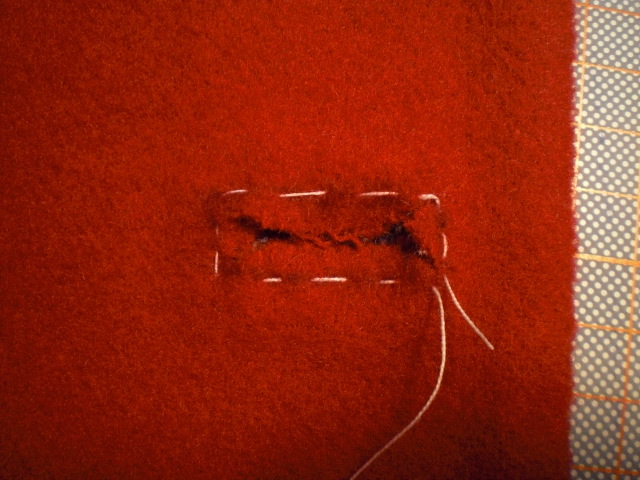
This particular buttonhole is 1cm wide, so the middle line stands at exactly 0,5 centimetres.

3. Now you have to cut the buttonhole open.
I found it useful and more safe, using my rotary cutter for cutting the middle section and a pointy pair of scissors for the diagonal lines.


4. Now's the tricky part. Open the two layers of the fabric using your fingers and carefully cutting the threads that hold them together, following my first tutorial on seam allowances.
Remember that this buttonhole is 1cm wide, so after cutting it, on step 3, I ended up with 0,5 cm edges, on the long sides. That 0,5cm edge will but turned inside, so I have to make sure that I open the two fabric layers at least 0,5cm. But that may lead to bulkyness, so I will open it more, about 1cm or a bit less, because remember that this will be a bound buttonhole and not only the edges will be sewn inside but also the welts.
It looks a mess right now, doesn't it? Don't worry, it will be pretty in a short while!


5. Now let's prepare the welts. The welts have to be one piece, but also be red on one side and grey on the other side. At least that's what I wanted. You may have them multicoloured, as in all red on both sides, or one welt grey and one red. What ever you want.
For my way, cut strips of the fabric and totally separate the two fabric layers, to end up with one grey and one red. For my 4 buttonholes I need 8 welts, which means I need 8 pieces of red and 8 of grey. The welts have to be wider than the actual buttonhole size, wide enough to allow me to sew them into the buttonhole and narrow enough to fit in the opening I made in step 4. Half a centimetre on each side is enough.
Take careful and accurate measurements and cut the welts. Sew the two sides together, one grey one red and interface them. This is the only part of the cape I used, to be more accurate, I could use, interfacing.


6. Back to the buttonhole now. Use basting thread to baste exactly on the marking. Turn the edges inside and give it a good press. Half a centimetre edge is small enough to give you a hard time while sewing the small welts in, so by predefining the edges of the buttonholes you gain time and patience!

7. We are very close to the end! Take the first welt, place it in the buttonhole, making sure the the free edge is 0,5cm. You may find it hand making a marking on the welt at exactly 0,5cm to align it with the buttonhole long edge.
Now it's time to start sewing. Catch the folded buttonhole edge and the welt. Be very careful at the corners. They have to be pointy to look pretty and they have to be strong, to last the longest while using them.

Sew one side and then move to the other side of the fabric. Every welt has to be sewn from both sides of the garment. Use different thread and needle and have it resting there, while sewing the other side.

8. Repeat for the opposite welt. Give the buttonhole a good press, with a pressing cloth and you're done!
Don't forget to sew the buttons back to back.


I measured my time. It took me 20 minutes to complete each buttonhole. I consider this to be a good time!

See you around
Maria
P.S. Let me know if you ever try this.
Next : How to hem with double faced wool
No comments:
Post a Comment